
How to Use LightBurn
Much like 3D printers, laser cutters need a slicing program to convert vector files into movement instructions for a given machine. Our program of choice is Lightburn, as it's UI is intuitive, the most important settings are readily available, and it's easy to set up for new users.
Installation
Versions of Lightburn for Windows, Linux, and Mac OS are available at their downloads page. Every new user is allowed a free 30 day trial period with full access to all features. After that, a lifetime license key can be purchased for $120 here.
Additional
Alternatively, students with a reservation for a laser cutter may come in to prepare their file on one of our workstations beforehand. During laser-training, we will walk you through using Lightburn, and we are always here to help should any issues arise.
Setting up for RPS use
New Device Setup
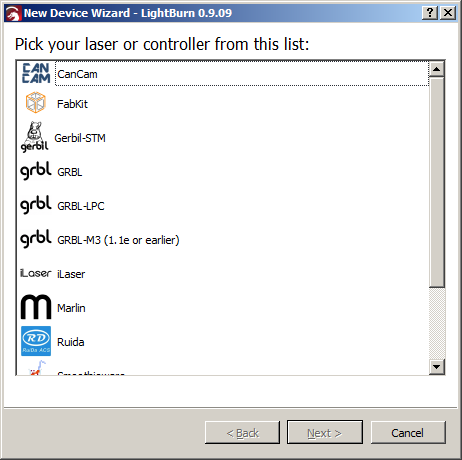
Download the setup file here. Open Lightburn, click Import, and select the Laser 1 file. Alternatively, use the step-by-step instructions below to set up your laser device.
Machine controller type: Ruida
Working area: 1400x900mm (XY)
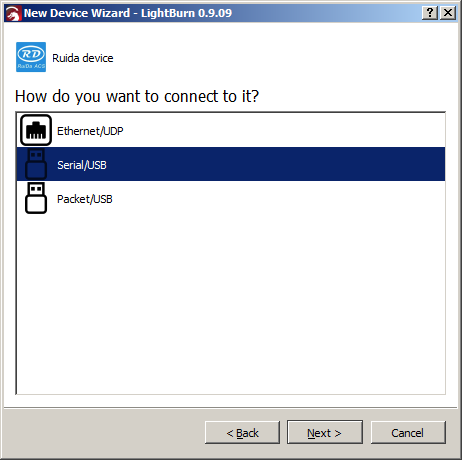
Connection Method: Packet/USB
Step 1 | Step 2 | Step 3 |
|---|---|---|
 |  |  |
Additional Setup
Job origin: Back Right (upper right)
Start From: User Origin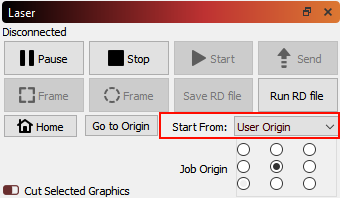
Download the material settings with this link: Lightburn Library Material Settings. You can import these settings to Lightburn as part of the setup process. Click Library in the bottom right then click Load to load this file. All material settings should import to your library. To change the material type, click the desired material and click Assign.
If you will be using Lightburn more in the future, "linking" materials to certain colors has proven to be useful. Highlight the shape and click Link. This will allow you to assign colors to different materials, thicknesses, and cuts/engravings.
Usage
Compared to 3D printing, the slicing process is quite simple, as there are far less parameters to take into account. Despite that, using the laser still requires utmost caution, as improper settings will lead to ineffective cutting at best, and will start a fire at worst.
We have a list of recommended laser settings for a variety of materials. For materials not on the list that do not produce any toxic gasses, we typically run some tests using small (10x10mm) square test cuts, adjusting laser power/speed until a satisfactory cut is produced.
We recommend watching the many great video tutorials that demonstrate basic Lightburn usage if you would like to learn more.
The basic premise:
- Load SVG or DXF vector file in millimeters. This will most likely come from an engineering drawing in Solidworks that must be exported in millimeters as well. Always double check units once imported.
- Adjust laser cut power & speed and number of passes in the bottom right corner based on the OMTech laser settings.
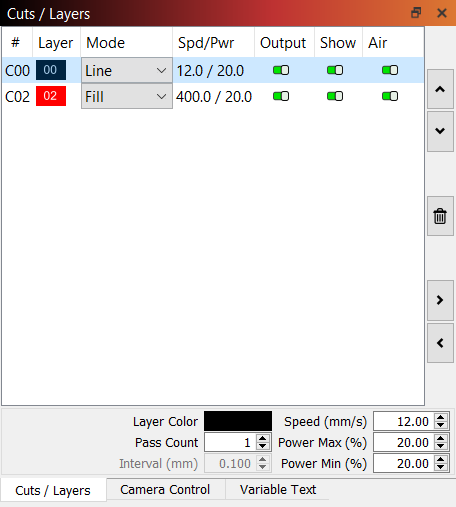
- Cut: set mode to Line
- Engrave: set mode to Fill
- To change the paths' order of cutting, select the shape you want to cut first and color it differently. A new cut layer will appear on the right. Move that new color to the top of the list, which will code this cut as the first part of the job.
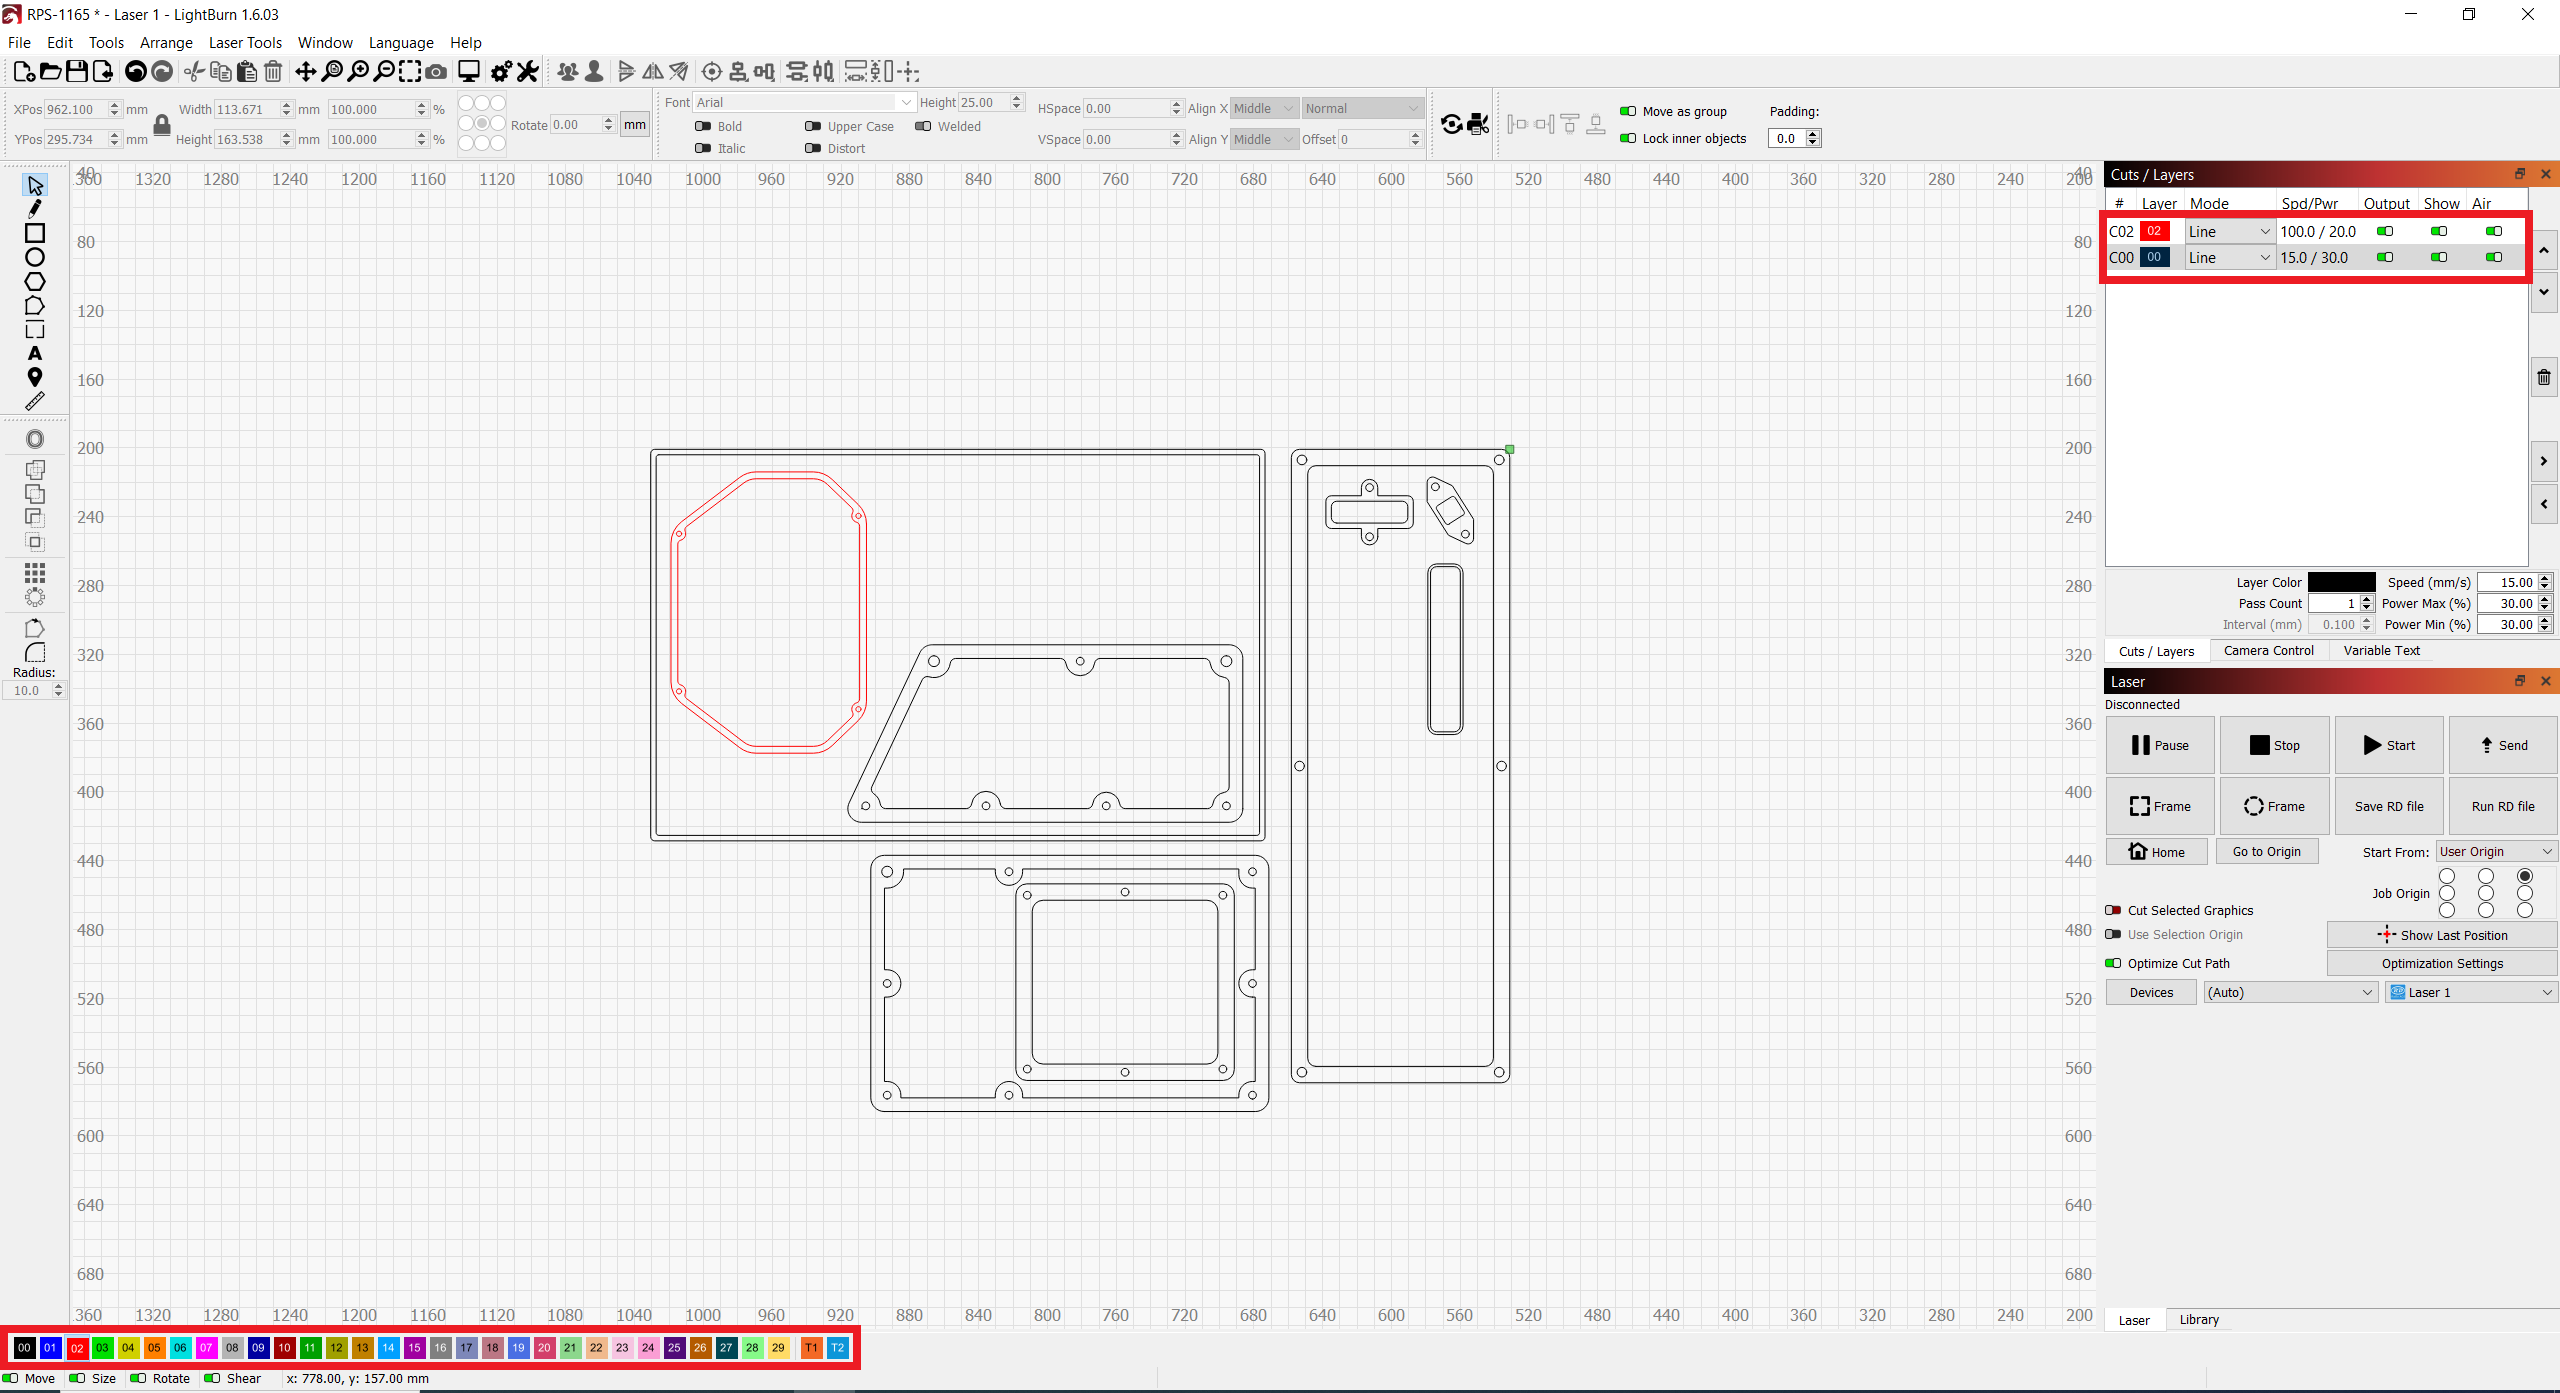
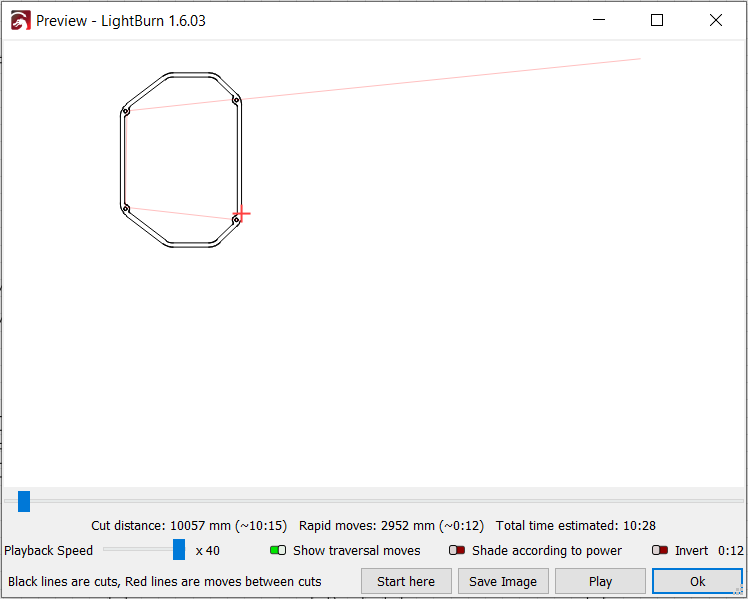
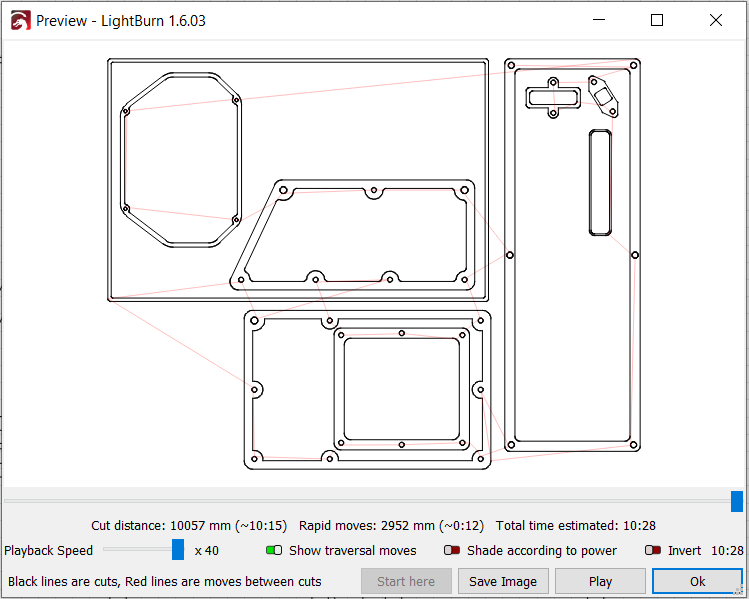
- To preview the job, press Alt+P which will show the exact path the laser will take. A good rule of thumb is to start with smaller, inner-most cuts and make the large, outer cuts last. This will ensure clean, quality cuts and prevent warping of inner cuts that still need to be made.
- Once file is ready, insert USB into your computer and click Save to RD file