How to Book Training Sessions
Last modified by Alex Troyer on 2025/05/29 17:46
This page provides an overview of how our reservation website works. It also covers instructions on booking a training session or reservation on specific equipment within the Rapid Prototyping Studio.
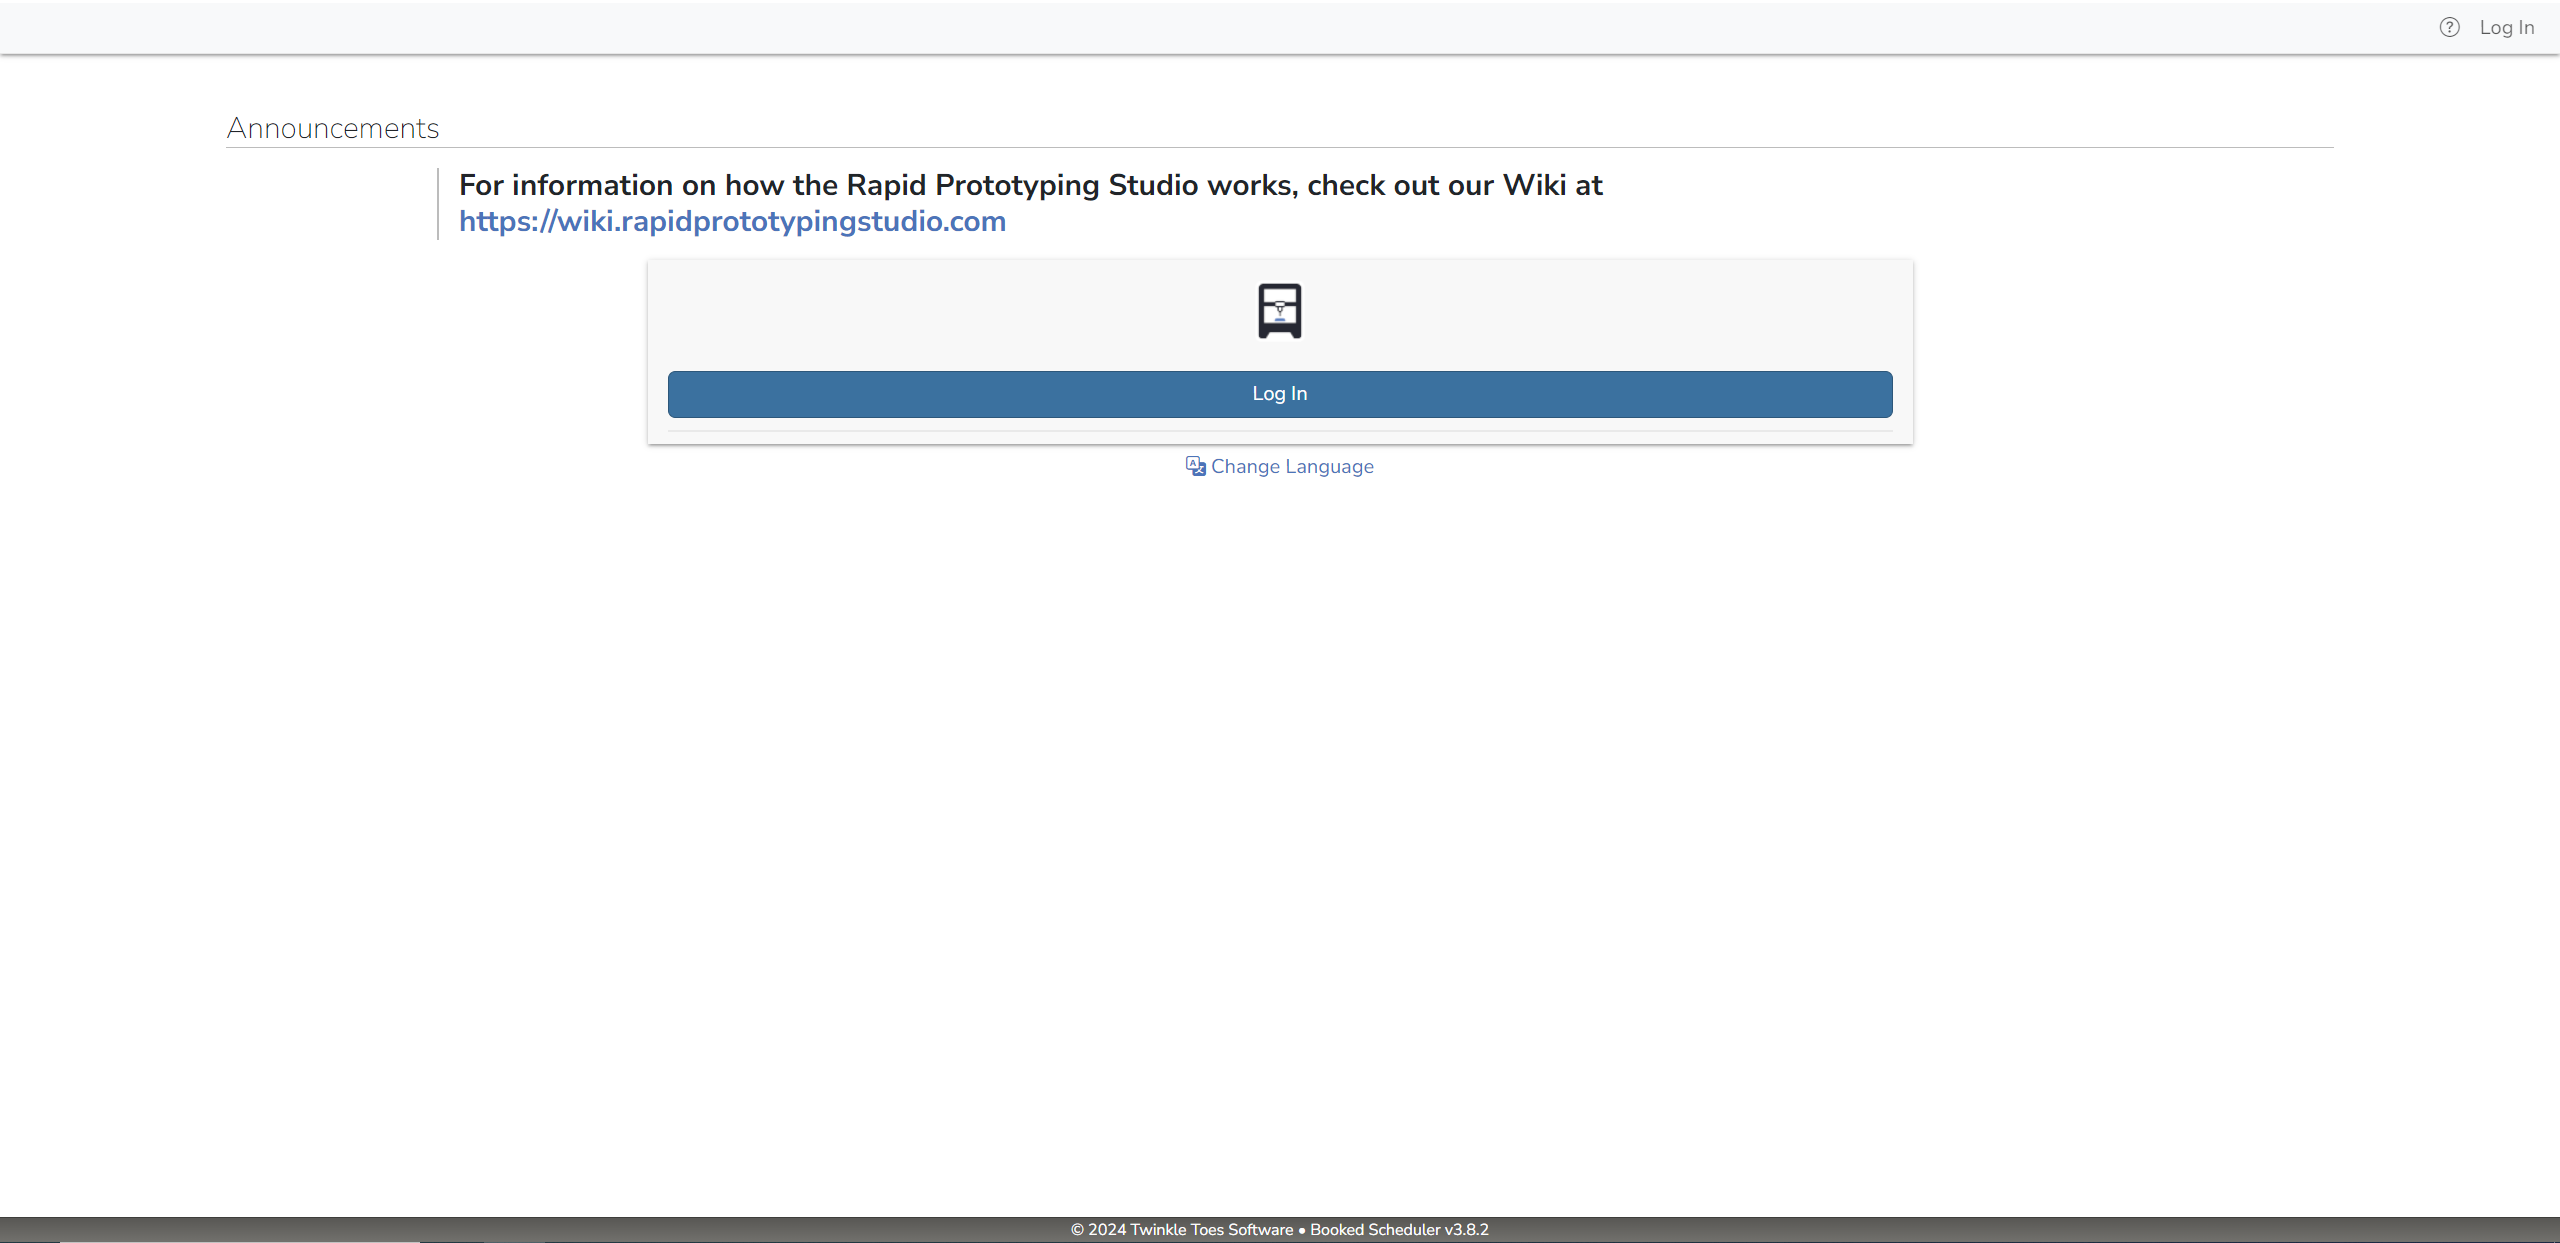
Logging In
If you are a new user, this section will help to provide an overview of how the website interface works, and how to navigate through the system.
- To begin, log in to our reservation website using your TAMU NetID (full email and credentials.) If you have issues with the login process, please drop by the Studio in JCAIN 422, or email us for assistance.
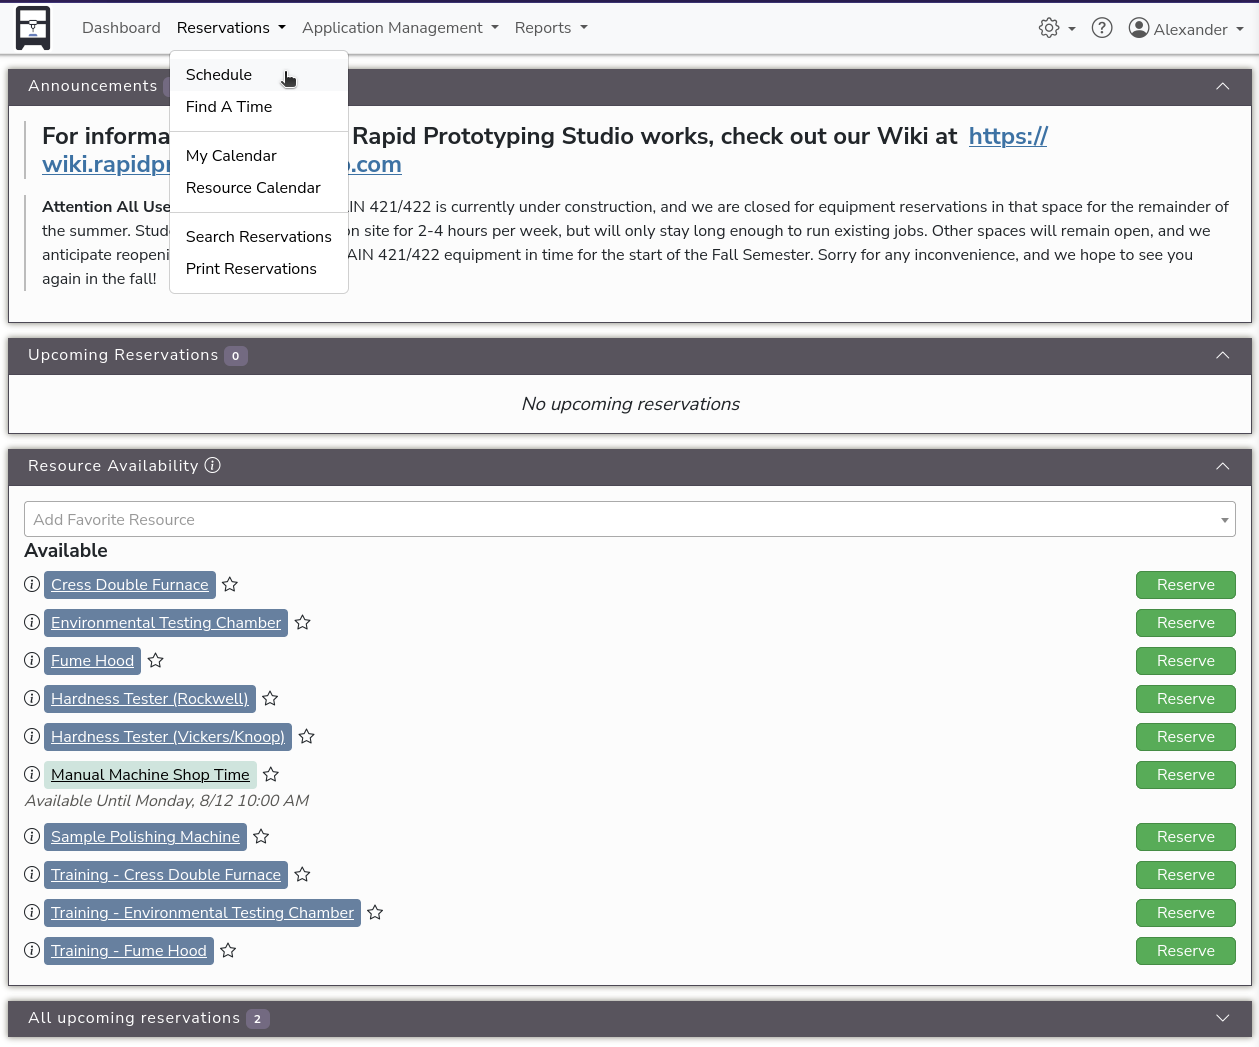
Once you have logged in successfully, You will be greeted with the Dashboard page, which will act as a landing page, with an overview of current announcements from the RPS Staff, and your upcoming reservations, etc. To find the main scheduling page, click on "Reservations" in the top bar. This dropdown provides access to several useful tools and links. The most relevant are listed below:
- Schedule: This will take you to the main scheduling calendar, where you can see machine availability, set up training sessions, and reserve equipment.
- Find a Time: This is a useful tool when RPS equipment usage is high and it's difficult to find a time to make a reservation. You can enter your required reservation length and other parameters, and the tool will tell you the soonest possible reservation slot that fits your criteria.
- My Calendar: This loads a calendar view of just your own existing reservations and training sessions.
- Resource Calendar: This loads a calendar view of all scheduled reservations and training sessions.
- For now, select "Schedule" in the dropdown.
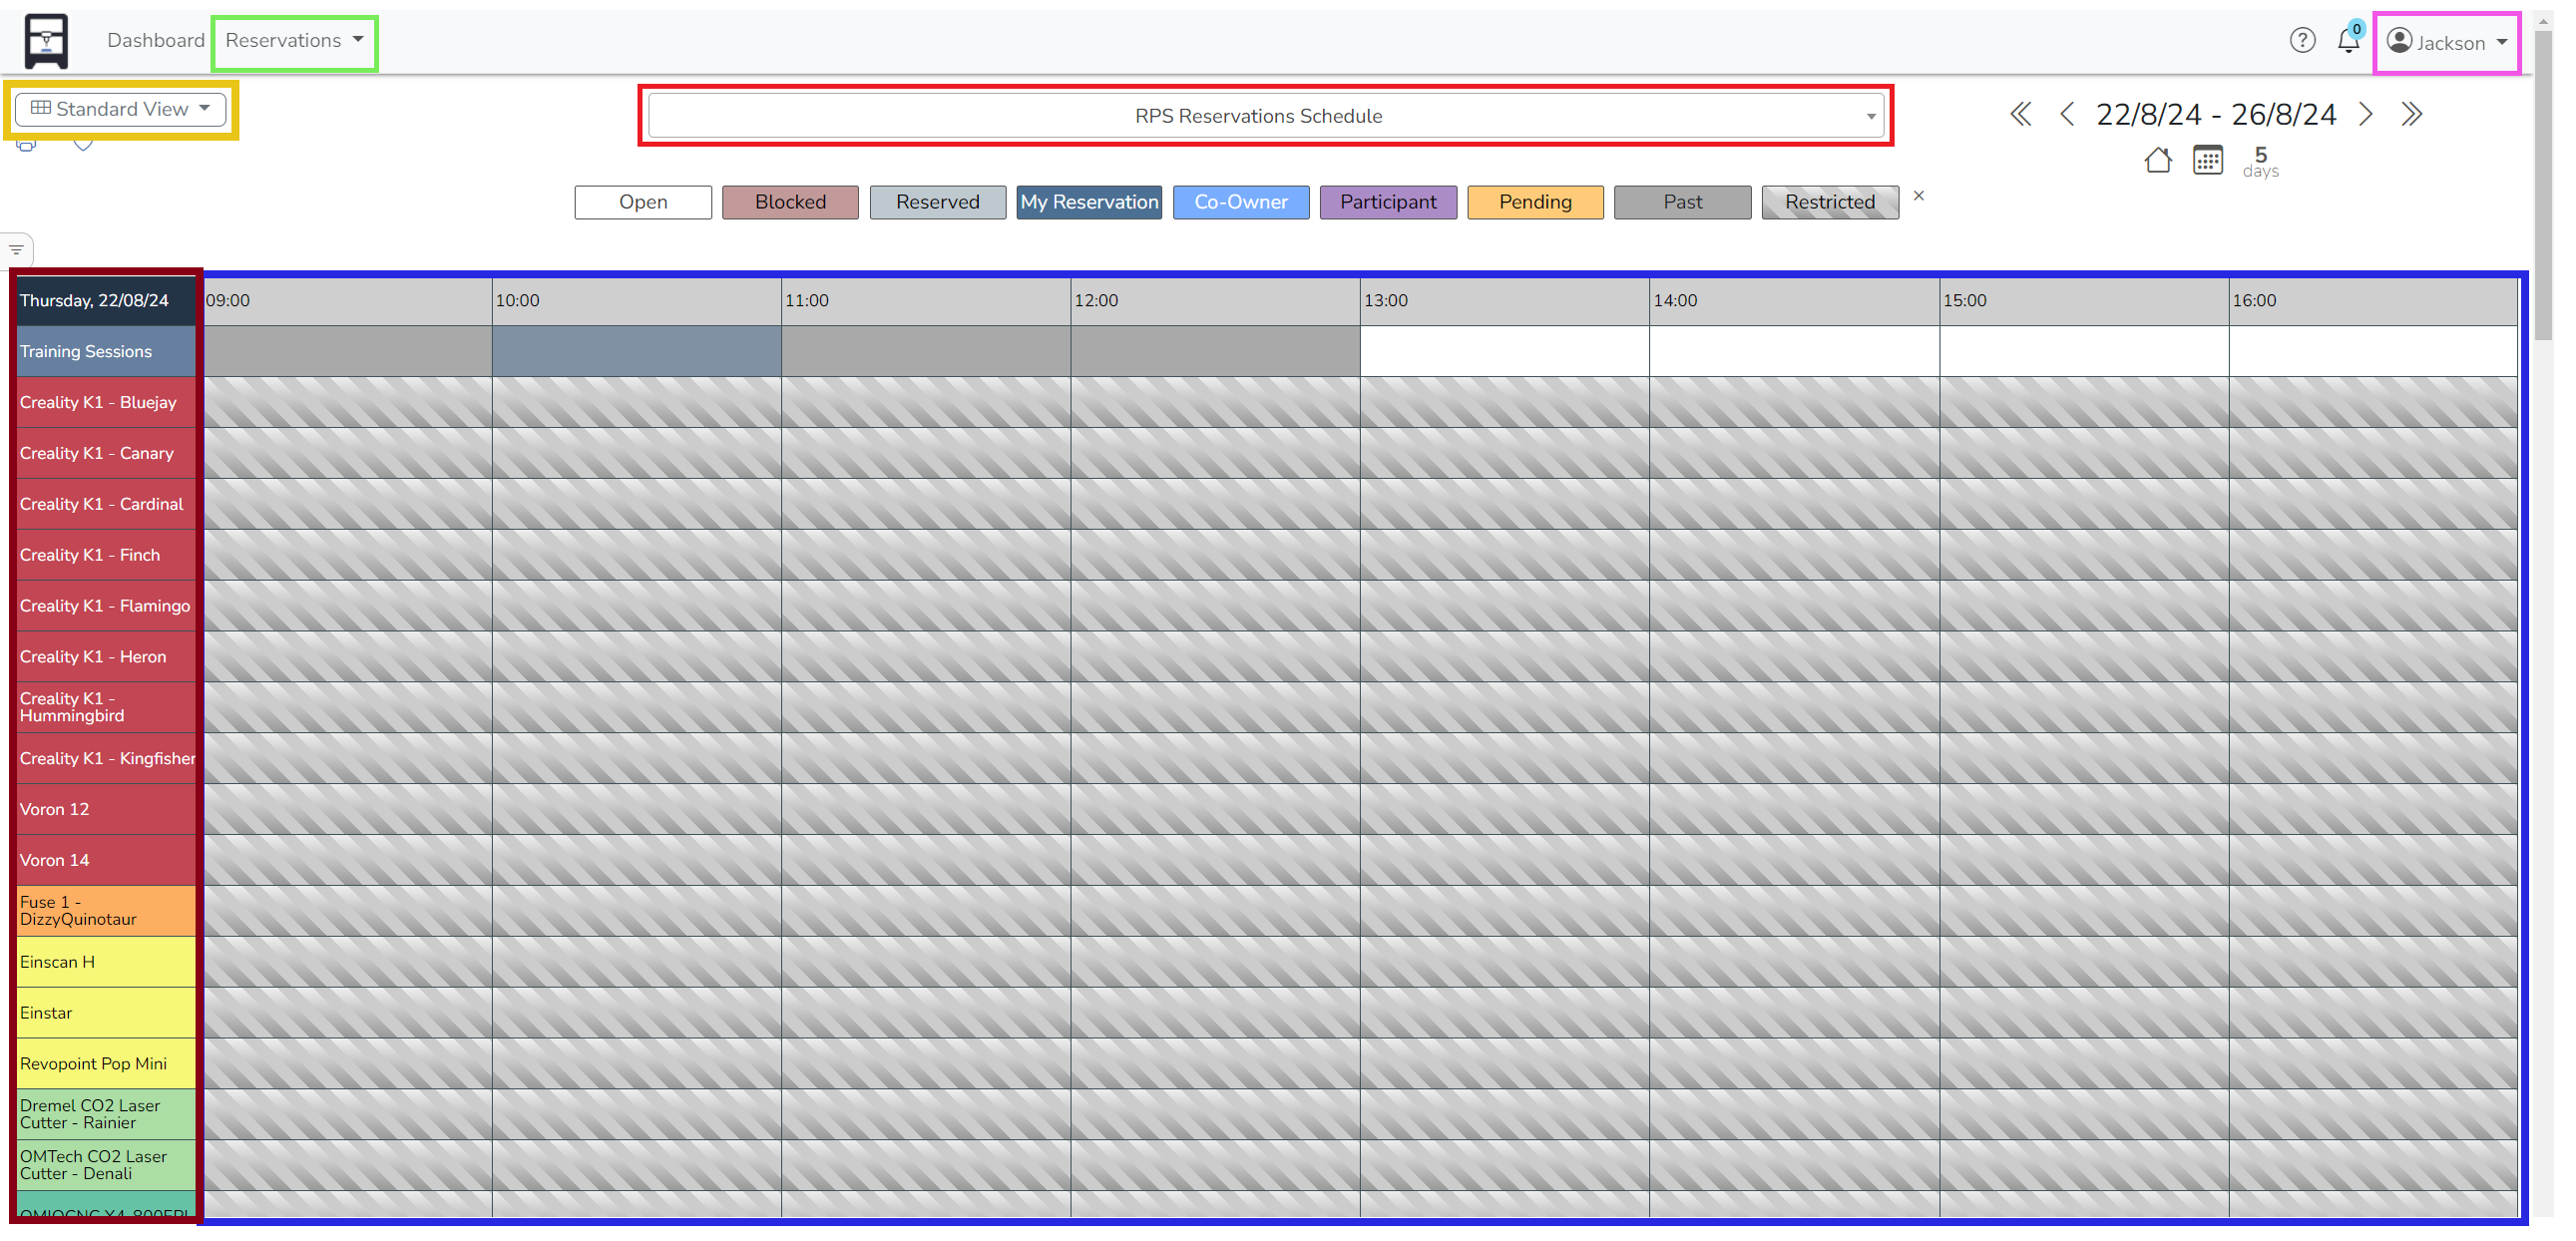
Reservation Calendar Overview
- Below is an image of the main scheduling page. In this image, we've color-coded several of the interface elements for your reference:
- Green - Reservations Menu: Outlined in the previous step.
- Pink - Username Menu: This menu shows your user profile information, credits, notification settings, open invitations, and the "Sign Out" button.
- Red - Schedule: This displays the current calendar you are looking at.
- Blue - Calendar: This is the calendar view of all visible reservation and training session slots on this schedule. The legend above the calendar indicates the status of each time-block. To book a reservation or training session, simply click on a future 'Open' (white) timeslot when you'd like to book a session. Doing this will bring you to the reservation creation pop-up form.
- Brown - Machines: These are all of the training session slots and machines that are currently open for use. Some machines in the shop may not be listed if they are undergoing maintenence or are not ready for student use yet. You will be able to reserve time on machines once you have been trained on them. The manufacturing types (such as FFF, SLA, SLS, Laser, CNC, etc.) are grouped by color. To train on a piece of equipment, select an open slot under the "Training Sessions" column, then specify the equipment to be trained on in the subsequent menu.
- Yellow - View Menu: Here you can select your view mode. Different view modes may help to understand the schedule better. Feel Free to adjust this to suit your preferences.
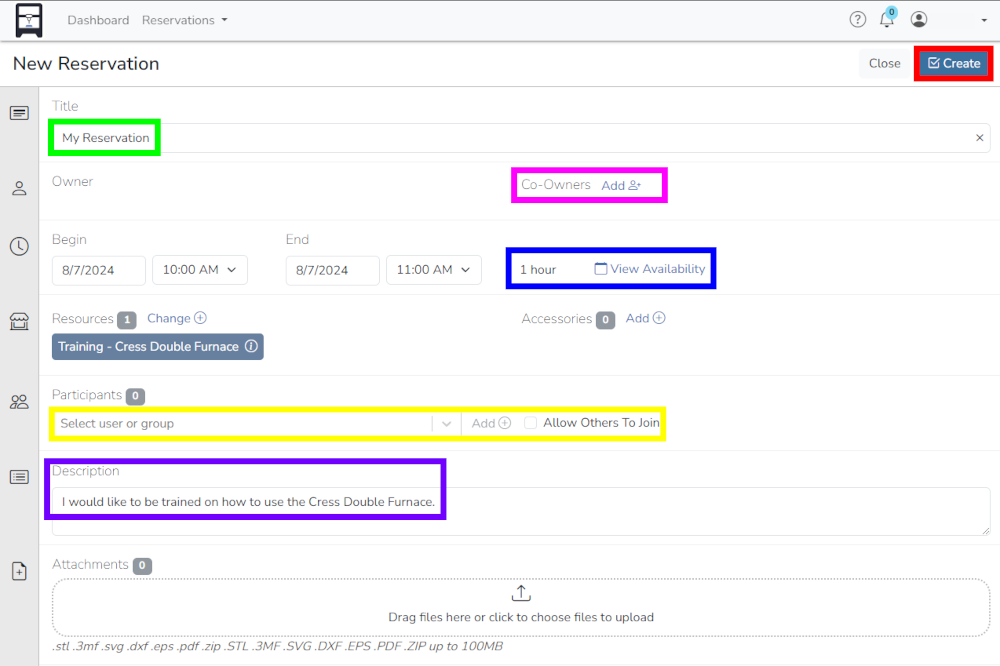
Creating a Training Session or Reservation
- Green, "Title" - This field is for adding a title to your reservation. It is not required, but is sometimes helpful.
- Pink, "Co-Owners" - Using this button will allow your teammates to join and edit the reservation after it has been created, if desired.
- Blue, "Availability" - This will display the other open slots for the day that you selected (if for example, you wanted to shift a reservation by an hour).
- Yellow, "Participants" - This is similar to the ""Co-Owners" field, but adding your teammates here will not allow them control of the reservation.
- Purple, "Description" - This field is for adding a description to your reservation. It is not required, but is sometimes helpful.
- Red, "Create" - After ensuring the other fields are correct, this button will create your reservation.